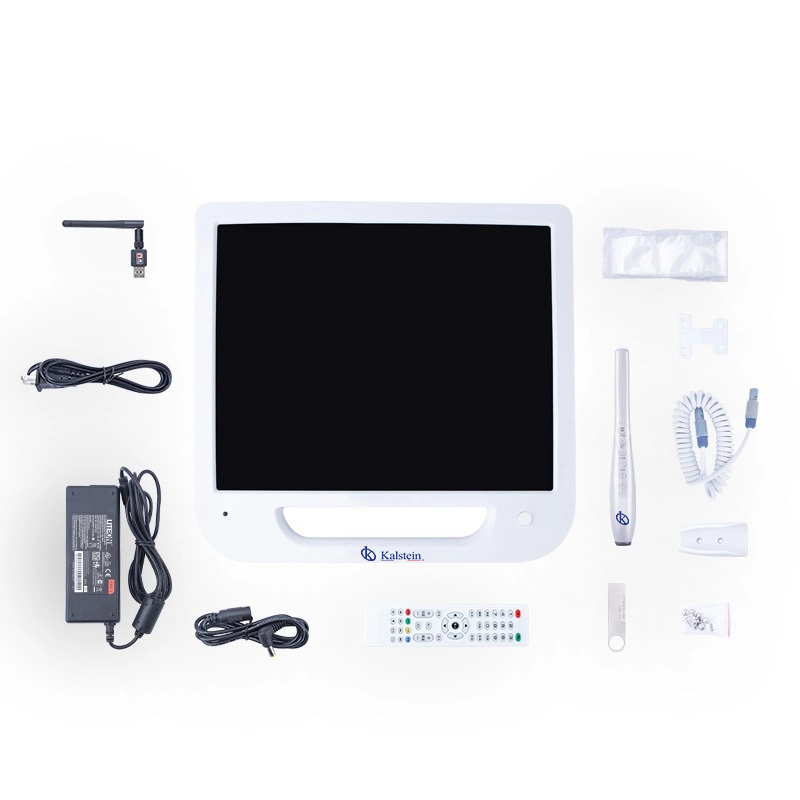
Installation and Commissioning Guide for the YR06012-OP6 Dental Accessories
The YR06012-OP6 is a crucial component designed to enhance the functionality of dental practices by providing high-quality intraoral imaging capabilities. This installation and commissioning guide aims to provide a comprehensive understanding of how to effectively set up the YR06012-OP6, ensuring that your dental practice operates smoothly and efficiently.
Understanding the YR06012-OP6
The YR06012-OP6 is equipped with advanced features that allow for high-quality imaging, making it essential for diagnostic purposes in a dental setting. Its integration into dental units is designed to enhance patient care and streamline workflows. Understanding these features will help in the effective use of the device.
Technical Specifications of YR06012-OP6
| Model | Brand | Category | Price USD | Net Weight | Gross Weight | Dimensions |
|---|---|---|---|---|---|---|
| YR06012-OP6 | Kalstein | Dental Accessories | 150.00 | 6 | x x |
Unboxing and Initial Setup
Upon receiving your YR06012-OP6, it is vital to perform a thorough inspection. Here is a checklist to follow:
- Ensure all components are included.
- Check for any visible damage during shipping.
- Review the user manual for any specific setup requirements.
When unboxing, place the device on a stable surface where it will ultimately be installed. Ensure that the area is free of any clutter that may obstruct access to the equipment during installation.
Installation Steps for the YR06012-OP6
Follow these steps to install the YR06012-OP6 correctly:
- Positioning: Place the YR06012-OP6 where it will be used, typically close to the dental chair.
- Connecting Power: Ensure that the device is plugged into a compatible power outlet. Verify that the voltage meets the specifications mentioned in the technical manual.
- Data Connection: If the YR06012-OP6 connects to a computer or network, establish the necessary connections using the provided cables.
It is critical to ensure that all connections are secure, as loose connections can lead to operational issues.
Calibration and First Run
Once installed, the YR06012-OP6 needs to be calibrated.
- Powering Up: Turn on the device and let it initialize.
- Calibration Settings: Access the calibration settings via the user interface. Follow the prompts to calibrate the device based on the manufacturer’s specifications.
- First Measurement: Conduct a test measurement to ensure that the system is working correctly.
Calibration is essential for accurate imaging results, so follow the steps meticulously.
Common Setup Mistakes
While installing the YR06012-OP6, be aware of common pitfalls:
- Neglecting to check connections before powering on can lead to false error codes.
- Incorrect calibration may result in poor image quality.
- Failing to place the device in a stable environment can affect performance.
By being mindful of these issues, you can ensure a smoother installation experience.
Maintenance and Troubleshooting
Regular maintenance is vital for the longevity of the YR06012-OP6. Here are some maintenance tips:
- Regularly clean the device as per the guidelines in the manual.
- Keep firmware updated to enhance performance and security.
- Perform routine checks on the connections and power supply.
In case of any issues, refer to the troubleshooting guide in the manual for specific error codes and solutions.
Frequently Asked Questions
What are the primary features of the YR06012-OP6?
The YR06012-OP6 features advanced intraoral imaging capabilities, enhancing the diagnostic process in dental practices. It includes user-friendly interface and high-resolution imaging.
How do I connect the YR06012-OP6 to my computer?
To connect the YR06012-OP6 to your computer, use the provided data cable and ensure both devices are powered on. Follow the setup instructions in the manual for software integration.
What maintenance is required for the YR06012-OP6?
Regular maintenance includes cleaning the device, checking connections, and updating software. Following the guidelines in the manual will help maintain optimal performance.
How can I troubleshoot common issues with the YR06012-OP6?
Refer to the troubleshooting section of the manual for common error codes and their solutions. Ensuring all connections are secure can prevent many issues.
Can the YR06012-OP6 be integrated with other dental equipment?
Yes, the YR06012-OP6 can be integrated with compatible dental units, enhancing the overall capability of your dental practice.
What is the warranty period for the YR06012-OP6?
The warranty period for the YR06012-OP6 is typically outlined in the purchase agreement and can range from one to three years, depending on the terms.
Where can I request a quote for the YR06012-OP6?
You can request a quote for the YR06012-OP6 through our dedicated inquiry forms or by contacting our sales team.
If you are looking for a fusion of innovation and quality, you have come to the right place. At Kalstein, we offer you the luxury of exploring our exclusive catalog of laboratory equipment. We manufacture every device to the highest standards of excellence. Our intuitive and seamless online purchasing channels are designed for your convenience, securing the most competitive prices. Hesitate no longer — we bring science to life, it is time to become part of our community.